Introduction
Tracking real-time location data is essential for applications like fleet management, asset tracking, and live location sharing. In this tutorial, we will build a real-time GPS tracking system that receives location data from a moving device and displays it dynamically on a web map.
What You’ll Learn
- How to set up a WebSocket server using FastAPI
- How to build a live web map with Leaflet.js
- How to simulate real-time GPS data using Python
- How to update the map dynamically as new location data arrives
By the end of this tutorial, you’ll have a working system that shows live GPS positions on a web map!
Step 1: Setting Up the Backend with FastAPI & WebSockets
Install Required Packages
To get started, install the necessary dependencies:
pip install fastapi uvicorn websockets folium
WebSocket Server (main.py)
We need a WebSocket server to handle real-time communication between the GPS device and the web client. Open main.py and add the following code:
from fastapi import FastAPI, WebSocket
import json

app = FastAPI()
active_connections = []

@app.websocket("/ws")
async def websocket_endpoint(websocket: WebSocket):
    await websocket.accept()
    active_connections.append(websocket)
    try:
        while True:
            data = await websocket.receive_text()
            location = json.loads(data)
            for connection in active_connections:
                await connection.send_json(location)
    except:
        pass
    finally:
        active_connections.remove(websocket)
Explanation:
- The WebSocket accepts connections from clients.
- It receives location updates from a GPS device.
- It broadcasts the location data to all connected clients.
Step 2: Creating the Real-Time Web Map with Leaflet.js
Now, let’s create an interactive web map using Leaflet.js. Open map.html and add the following:
<!DOCTYPE html>
<html>
<head>
    <title>Real-Time GPS Tracking</title>
    <link rel="stylesheet" href="https://cdnjs.cloudflare.com/ajax/libs/leaflet/1.7.1/leaflet.css">
    <script src="https://cdnjs.cloudflare.com/ajax/libs/leaflet/1.7.1/leaflet.js"></script>
</head>
<body>
    <h1>Live GPS Tracking</h1>
    <div id="map" style="height: 600px;"></div>
    <script>
        var map = L.map('map').setView([0, 0], 2);
        L.tileLayer('https://{s}.tile.openstreetmap.org/{z}/{x}/{y}.png', { maxZoom: 19 }).addTo(map);

        var ws = new WebSocket(`ws://${window.location.host}/ws`);
        ws.onmessage = function(event) {
            var data = JSON.parse(event.data);
            L.marker([data.latitude, data.longitude]).addTo(map);
            map.setView([data.latitude, data.longitude]);
        };
    </script>
</body>
</html>
Explanation:
- Initializes a Leaflet map centered at
[0, 0]. - Establishes a WebSocket connection to receive location updates.
- Adds real-time markers when new GPS data is received.
Step 3: Simulating a Moving GPS Device
We need to simulate real GPS data to test our system. Open test_location.py and add:
import asyncio
import websockets
import random
import json

async def send_locations():
    uri = "ws://127.0.0.1:8000/ws"
    async with websockets.connect(uri) as websocket:
        for i in range(1000):
            location_data = {
                "latitude": round(random.uniform(37.53151, 37.63151), 6),
                "longitude": round(random.uniform(45.048022, 45.060), 6)
            }
            await websocket.send(json.dumps(location_data))
            print(f"Sent location: {location_data}")
            await asyncio.sleep(5)

if __name__ == "__main__":
    asyncio.run(send_locations())
Explanation:
- Generates random latitude and longitude values within a small range.
- Sends location updates every 5 seconds to the WebSocket server.
- Simulates a moving GPS device over time.
Step 4: Running the Full System
1️⃣ Start the WebSocket Server
uvicorn main:app --reload
2️⃣ Open the Web Map
Go to http://127.0.0.1:8000/ in your browser. The map should be ready to receive location updates.
3️⃣ Start the GPS Device Simulation
python test_location.py
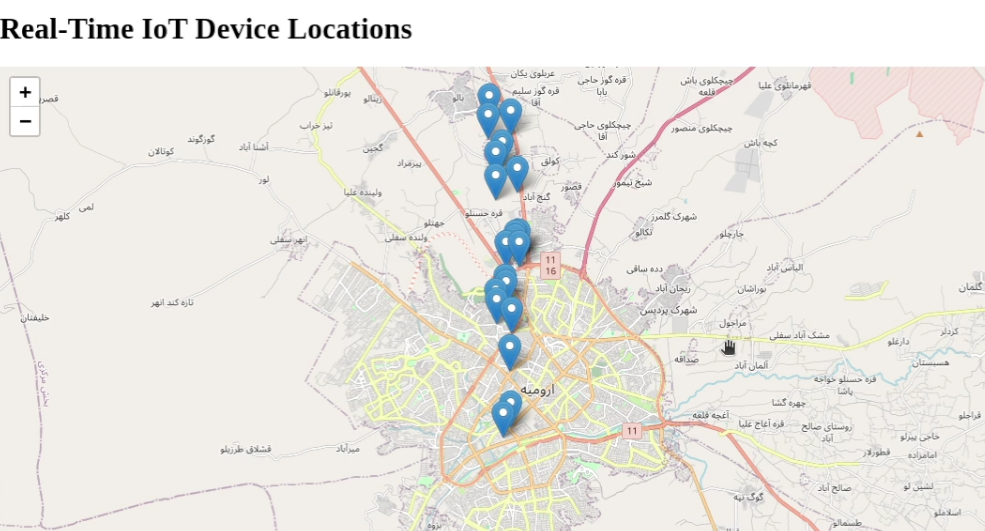
🗺 Watch the markers update in real-time!
Step 5: Enhancing the System
This basic system works well, but you can improve it by:
- Using real GPS data instead of random values.
- Storing locations in a database for history tracking.
- Drawing movement paths instead of single markers.
- Adding a dashboard to display additional device details.
🚀 What features would you add? Let us know in the comments!
Conclusion
Congratulations! 🎉 You have built a real-time GPS tracking system using FastAPI, WebSockets, and Leaflet.js. This is a great starting point for fleet tracking, delivery services, or IoT applications.
📌 Key Takeaways: ✅ WebSockets enable real-time data exchange. ✅ Leaflet.js provides a simple yet powerful web map. ✅ Python makes it easy to simulate GPS movements.
💡 Next Steps: 🔹 Use real-world GPS data from a smartphone or IoT device. 🔹 Store location updates in a PostgreSQL database with PostGIS. 🔹 Implement user authentication for secure tracking.
📢 Follow us for more GIS & Web Mapping tutorials! 🚀